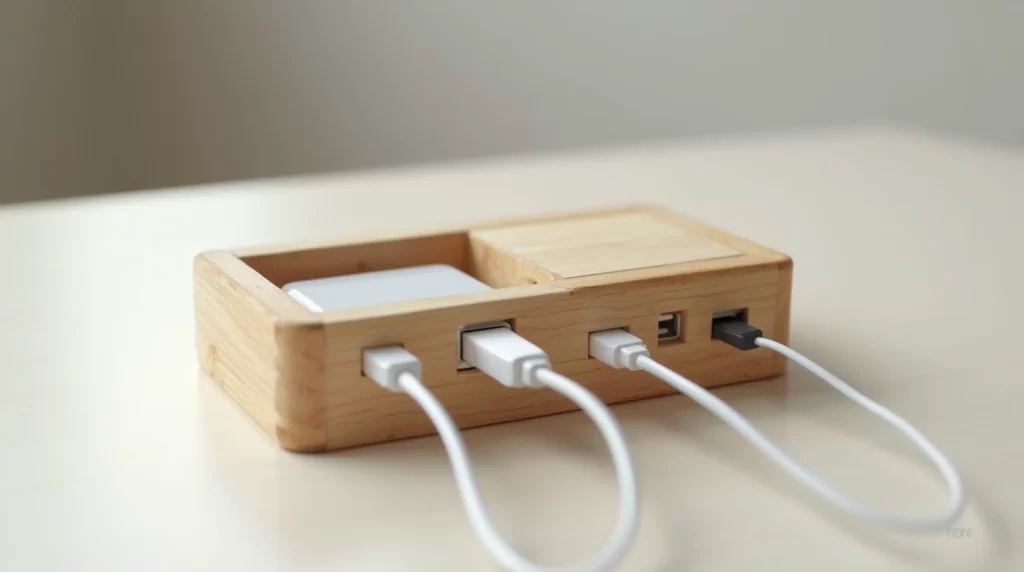
Tired of scrambling to find an available USB plug every time you need to charge your phone, tablet, or wireless headphones? A DIY USB charging station can solve this once and for all—providing a centralized hub where all your devices can power up in style. In this step-by-step guide, you’ll learn how to create a customized charging station that suits your home’s décor and needs.
1. Why Build a Custom USB Charging Station?
Centralized Convenience: Instead of having cables sprawled over countertops or desks, a dedicated hub keeps everything tidy.
Device Protection: Good-quality USB power supplies help regulate voltage and prevent overcharging or short circuits.
Personalized Design: Whether you prefer a rustic wooden box or a sleek modern enclosure, you can match the station to your home’s aesthetic.
Note: If you need additional circuits or outlets for more extensive electrical projects, consult a licensed electrician. Learn more in our Essential Tools for Basic Electrical Maintenance article.
2. Tools and Materials You’ll Need
1. Multi-port USB Charger Module:
• A reliable power supply that can deliver at least 2.0 amps per port (adjust as needed for fast charging).
2. Enclosure or Box (Wooden, Plastic, or Metal):
• Large enough to hold the USB charger plus any extra cables.
3. Drill and Drill Bits:
• For creating holes in the enclosure for USB ports or cable pass-through.
4. Jigsaw or Hole Saw (Optional):
• If you plan on cutting larger openings or more complex shapes.
5. Sandpaper or File (If Using Wood):
• Smooth out rough edges after drilling or cutting.
6. Screws, Velcro Strips, or Hot Glue:
• Secure the USB charger inside the enclosure without movement.
7. Cable Management Accessories (Zip Ties, Cable Clips):
• Keep interior wiring neat and easy to maintain.
8. Protective Gear:
• Eye protection, gloves, and a dust mask (if cutting or sanding wood/metal).
3. Plan Your Station: Location and Design
1. Choose a Location:
• A hallway table, entryway shelf, or kitchen countertop is often ideal.
• Ensure you have easy access to a wall outlet or extension cord.
2. Sketch Your Layout:
• Determine how many ports you need (phone, tablet, smartwatch, e-reader, etc.).
• Decide if you want device slots or just cable pass-through holes.
3. Ventilation Considerations:
• Chargers can produce heat. If using a closed enclosure, create small vents or cutouts to allow airflow.
4. Assembly Steps
1. Mark and Drill Holes:
• Using a pencil, mark where the USB ports or cables will pass through.
• Drill pilot holes before using a larger drill bit or hole saw to avoid splitting wood or cracking plastic.
2. Attach the USB Charger Module:
• Position it so the ports align with your drilled holes or opening.
• Secure it inside using small screws, Velcro, or hot glue—ensuring it’s stable and easily removable if needed.
3. Organize Interior Cables:
• Use zip ties or cable clips to bundle excess wiring.
• Leave enough slack for each cable to reach the port comfortably.
4. Install an External Power Connection:
• Feed the USB charger’s power cord through the back of the enclosure, so only one cable plugs into the wall.
• If you need extra length, use a reliable extension cord.
5. Optional Device Slots:
• If you want each device to stand upright, measure your gadgets and cut wooden or acrylic dividers.
• Sand or file edges for a smooth finish, then attach them inside the box.
5. Testing and Safety Checks
1. Pre-Power Inspection:
• Ensure no wires are pinched or exposed.
• Double-check that the charger is secured and not near flammable materials.
2. Plug It In:
• Turn on the USB charger and test each port with different devices.
• Watch for any flickering, unusual heat, or odd sounds.
3. Monitor for 24 Hours:
• Keep an eye on temperatures and watch for any signs of voltage drops or device charging issues.
• If you suspect a problem with your electrical outlet, consult a qualified electrician for an inspection.
6. Finishing Touches and Upgrades
1. Paint or Stain the Enclosure (If Wooden):
• Give it a professional look that matches your home’s décor.
• Use interior-grade paint or finish for durability.
2. Label Ports:
• If some ports offer higher amperage for tablets or fast charging, label them for easy identification.
3. Add LED Indicators (Optional):
• Small LEDs can show which ports are in use or if the station is powered.
4. Smart Integration:
• Some advanced USB chargers offer app-based monitoring. You can see the charging status of each port in real time.
7. Conclusion and Next Steps
A DIY USB charging station simplifies everyday life—offering central, clutter-free charging for all your gadgets. By using quality tools, robust safety practices, and a bit of creativity, you can build a hub that’s both practical and stylish.
Got bigger electrical projects in mind? From panel upgrades to generator installations and more, Kendrick Electric has the expertise to keep your home powered safely. Call (435) 752-1888 or send us a message to learn how we can help with all your residential electrical needs.


